Beyond MIG: How Crusoe and Project-HAMi unleash the full power of L40S
Maximize your NVIDIA L40S GPU's potential with this guide to Project-HAMi on Crusoe Cloud. Learn how to enable multi-instance functionality for greater efficiency and resource sharing.

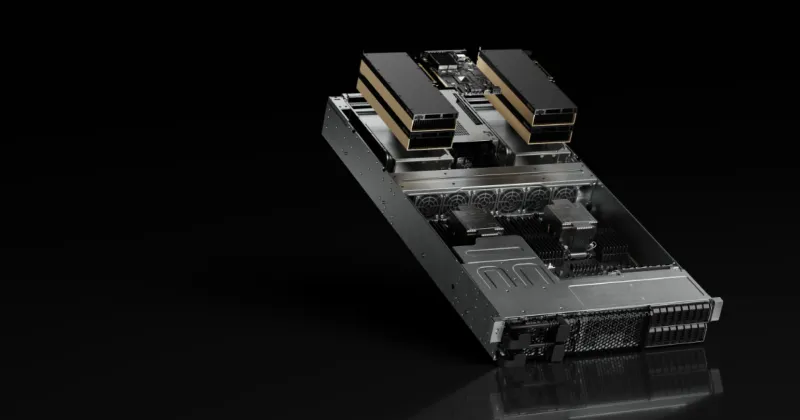
The NVIDIA L40S GPU is a versatile powerhouse for the modern data center. Built on the Ada Lovelace GPU architecture, it handles a wide range of demanding workloads with a massive 48GB of GDDR6 memory and advanced RT cores and fourth-generation Tensor Cores. This makes the L40S an ideal choice for a variety of use cases, from large-scale generative AI and large language model (LLM) inference to demanding 3D design, interactive rendering, and 3D professional visualization workflows.
While the L40S enables a variety of graphical and AI use cases, it doesn’t come with out-of-the-box multi-instance GPU (MIG) support like other NVIDIA GPUs. It can be challenging for running multiple tasks and users simultaneously by partitioning the GPU into smaller, isolated instances with dedicated resources. This makes it challenging to efficiently share a single L40S among different users or jobs without risking resource conflicts.
Fortunately, there's a solution. We'll walk you through how to use the open-source Project-HAMi to enable multi-instance functionality on your L40S GPUs within your Crusoe Managed Kubernetes (CMK) cluster, ensuring you get the absolute most from your hardware.
What is Project-HAMi?
HAMi (Heterogeneous AI Computing Virtualization Middleware) is a CNCF Sandbox project that optimizes GPU utilization within Kubernetes clusters. This open-source middleware enables fine-grained resource sharing, isolation, and scheduling for AI workloads.
By intercepting the CUDA API, HAMi provides soft isolation and enforces resource quotas (memory and compute) per process, ensuring long-term usage stays within assigned limits. This creates a unified interface for diverse hardware, simplifying the deployment and management of AI applications in cloud-native environments.
Step 1: Cluster + node pool creation
Crusoe Managed Kubernetes (CMK) simplifies running Kubernetes for AI workloads by offering fully-managed control planes, so you don’t have to worry about the availability, scaling, or lifecycle of the control plane nodes.
First, you'll create a CMK Cluster and a Nodepool using the Crusoe CLI:
$ crusoe kubernetes clusters create \
  --name project-hami \
  --project-id <project_id> \
  --subnet-id <subnet_id> \
  --location us-east1-a \
  --cluster-version 1.30.8-cmk.31 \
  --add-ons "nvidia_gpu_operator,nvidia_network_operator,crusoe_csi"
You can verify your cluster details with the following command:
$ crusoe kubernetes clusters get project-hamiThe output confirms the cluster's state and configuration:
name: project-hami
id: b5e7b3a4-ae41-4a17-bbb0-829b4ad29dcf
configuration: ha
state: STATE_RUNNING
version: 1.30.8-cmk.31
location: us-east1-a
...
Now, create a nodepool with the L40S GPU type:
$ crusoe kubernetes nodepools create --name l40s-np --cluster-name project-hami --type l40s-48gb.10x --count 1Once the node pool is created, you can fetch its details for reference:
$ crusoe kubernetes nodepools get l40s-npThe output shows the node pool is ready with the L40S GPU instance:
node pool name: l40s-np
id: 2a0c12b2-2c60-4a05-99e2-2470a7391527
state: STATE_RUNNING
type: l40s-48gb.10x
desired count: 1
running count: 1
image: 1.30.8-cmk.31
...
Confirm that the node is ready within Kubernetes itself:
$ kubectl get nodesThe output confirms this:
$ kubectl get nodes
NAME                                        STATUS   ROLES    AGE     VERSION
np-2a0c12b2-1.us-east1-a.compute.internal   Ready    <none>   11m     v1.30.8
Before installing HAMi, you can check the default resource allocation. The kubectl describe node command shows that Kubernetes sees each of your L40S GPUs as a single, indivisible resource. The output will confirm that it shows 10 GPUs, which corresponds to the number of physical GPUs on your node.
Step 2: Install Project-HAMi with Helm
Next, you'll install Project-HAMi onto your Kubernetes cluster using its official Helm chart. This is the simplest and most recommended way to get started.
First, add the HAMi Helm repository to your local configuration:
$ helm repo add hami-charts https://project-hami.github.io/HAMi/Next, install the HAMi chart, which will deploy the necessary device plugin and scheduler components to your cluster:
$ helm install hami hami-charts/hami -n kube-systemYou can verify that the HAMi pods are running by checking the pods in the kube-system namespace. You should see both the hami-device-plugin and hami-scheduler pods in a Running state.
$ kubectl get pods -A | grep hami
kube-system               hami-device-plugin-2hrrr                                          2/2     Running                 0               103s
kube-system               hami-scheduler-7b47c4b59d-f9q6j                                   2/2     Running                 1 (26m ago)     32m
Step 3: Label your node + verify the device plugin's registration
Now, you need to label your Kubernetes node. This tells the HAMi device plugin which nodes have GPUs that it needs to manage.
$ kubectl label node np-2a0c12b2-1.us-east1-a.compute.internal gpu=onProject-HAMi uses a ConfigMap to define how it should virtualize your GPUs. The key parameter here is devicesplitcount, which determines how many virtual GPUs (vGPUs) each physical GPU will be split into.
You can check this value in the hami-device-plugin ConfigMap:
$ kubectl get cm hami-device-plugin -n kube-system -o yaml | grep devicesplitcount
"devicesplitcount": 10,
With 10 physical L40S GPUs on the node, this configuration will create a total of 100 vGPU slots, which Kubernetes can now see and schedule workloads onto.
Once the node is labeled, the Project-HAMi device plugin automatically detects the L40S GPUs and registers each one with Kubernetes. You can view the logs of the device plugin pod to see this process in action.
$ kubectl logs hami-device-plugin-2hrrr -n kube-systemThe logs confirm that each GPU has been registered with its ID, memory (46 GB), compute share, and the number of vGPU splits ("count": 10).
Step 4: Confirm GPU allocation in Kubernetes
The final step is to verify that Kubernetes recognizes the newly available vGPU resources. You can check the node's status using kubectl describe node.
You'll now see a new Capacity and Allocatable resource: nvidia.com/gpu. The value will correspond to the total number of vGPU slots created by the device plugin.
$ kubectl describe node np-2a0c12b2-1.us-east1-a.compute.internalThe output confirms that each GPU has been virtualized into 10 vGPU slots:
Capacity:
...
  nvidia.com/gpu:     100
...
Allocatable:
...
  nvidia.com/gpu:     100
...
This confirms that Project-HAMi has successfully virtualized your L40S GPUs.
Real-world use cases and examples
Now that your cluster is configured, let's look at a few examples of how you can use HAMi to share your L40S GPUs.
Example 1: Sharing one physical GPU among multiple pods
In this scenario, we'll run two pods (pod-a and pod-b) that share a single L40S GPU, while a third pod (pod-c) gets a dedicated GPU.
Here's the YAML for the pods:
apiVersion: v1
kind: Pod
metadata:
  name: pod-a
spec:
  containers:
    - name: container
      image: ubuntu:18.04
      command: ["bash", "-c", "sleep 86400"]
      resources:
        limits:
          nvidia.com/gpu: 1
          nvidia.com/gpumem-percentage: 50
          nvidia.com/gpucores: 50
      env:
        - name: NVIDIA_VISIBLE_DEVICES
          value: "0"

---
apiVersion: v1
kind: Pod
metadata:
  name: pod-b
spec:
  containers:
    - name: container
      image: ubuntu:18.04
      command: ["bash", "-c", "sleep 86400"]
      resources:
        limits:
          nvidia.com/gpu: 1
          nvidia.com/gpumem-percentage: 50
          nvidia.com/gpucores: 50
      env:
        - name: NVIDIA_VISIBLE_DEVICES
          value: "0"

---
apiVersion: v1
kind: Pod
metadata:
  name: pod-c
spec:
  containers:
    - name: container
      image: ubuntu:18.04
      command: ["bash", "-c", "sleep 86400"]
      resources:
        limits:
          nvidia.com/gpu: 1
          nvidia.com/gpumem-percentage: 100
          nvidia.com/gpucores: 100
      env:
        - name: NVIDIA_VISIBLE_DEVICES
          value: "1"
To confirm the physical allocation, you can check the GPU status from inside each pod using nvidia-smi -L. The output from the first two pods confirms they are sharing the same physical GPU, while the third pod is on a separate one.
$ kubectl exec -it pod-a -- nvidia-smi -L
$ kubectl exec -it pod-b -- nvidia-smi -L
$ kubectl exec -it pod-c -- nvidia-smi -L

# pod-a output
GPU 0: NVIDIA L40S (UUID: GPU-b5f7218b-5977-3748-76e3-5b552554860c)

# pod-b output
GPU 0: NVIDIA L40S (UUID: GPU-b5f7218b-5977-3748-76e3-5b552554860c)

# pod-c output
GPU 0: NVIDIA L40S (UUID: GPU-021d64e1-12ae-4903-c516-d35e2f75873b)
Example 2: Requesting multiple vGPUs for a single pod
In this example, a single pod requests two vGPU slots. HAMi may assign two slices from the same physical GPU or one slice from each of two GPUs, depending on availability.
Here is the YAML for a pod requesting two vGPUs:
apiVersion: v1
kind: Pod
metadata:
  name: memory-fraction-gpu-pod
spec:
  containers:
    - name: ubuntu-container
      image: ubuntu:18.04
      command: ["bash", "-c", "sleep 86400"]
      resources:
        limits:
          nvidia.com/gpu: 2
          nvidia.com/gpumem-percentage: 25
          nvidia.com/gpucores: 30
After deploying the pod, you can use nvidia-smi to see which GPUs were assigned. The output confirms that the pod received two separate GPU slices. In this case, each slice provides 25% of the GPU's memory, while HAMi enforces the 30% core limit via time-slicing.
$ kubectl exec -it memory-fraction-gpu-pod -- nvidia-smi

+-----------------------------------------------------------------------------------------+
| NVIDIA-SMI 570.133.20             Driver Version: 570.133.20     CUDA Version: 12.8     |
|-----------------------------------------+------------------------+----------------------+
| GPU  Name                 Persistence-M | Bus-Id          Disp.A | Volatile Uncorr. ECC |
| Fan  Temp   Perf          Pwr:Usage/Cap |           Memory-Usage | GPU-Util  Compute M. |
|                                         |                        |               MIG M. |
|=========================================+========================+======================|
|   0  NVIDIA L40S                    On  |   00000002:00:01.0 Off |                    0 |
| N/A   40C    P8             36W /  350W |       0MiB /  11517MiB |      0%      Default |
|                                         |                        |                  N/A |
+-----------------------------------------+------------------------+----------------------+
|   1  NVIDIA L40S                    On  |   00000003:00:03.0 Off |                    0 |
| N/A   32C    P8             36W /  350W |       0MiB /  11517MiB |      0%      Default |
|                                         |                        |                  N/A |
+-----------------------------------------+------------------------+----------------------+

+-----------------------------------------------------------------------------------------+
| Processes:                                                                              |
|  GPU   GI   CI              PID   Type   Process name                        GPU Memory |
|        ID   ID                                                               Usage      |
|=========================================================================================|
|  No running processes found                                                             |
+-----------------------------------------------------------------------------------------+
This demonstrates how Project-HAMi enables flexible, safe GPU sharing, allowing you to run multiple workloads on a single GPU while still accommodating jobs that require dedicated, multi-GPU resources.
Ready to unlock the power of your NVIDIA L40S GPUs?
You've done the hard work of building and deploying your AI workloads. Now, it's time to ensure they're running as efficiently as possible. By leveraging Project-HAMi on Crusoe Cloud, you're not just getting a GPU; you're getting a solution that allows you to maximize the value of every single L40S, giving you the flexibility to run multiple jobs on one card and the power to accelerate your projects.
This post is just one example of how Crusoe provides the tools and expertise to help builders go faster. We're committed to solving the toughest challenges in AI infrastructure, from sourcing sustainable energy to optimizing your compute performance.
If you're ready to stop worrying about infrastructure and start focusing on innovation, our team is here to help. Explore Crusoe Cloud for yourself.

.jpg)

